Campervan Battery Size and Solar Calculator
If you're wondering what size leisure battery and solar panels you need for your campervan, this guide is for you.

If you're wondering what size leisure battery and solar panels you need for your campervan, this guide is for you.
To make it easy to get the answer, I've created a free Campervan Battery Size Calculator in a simple spreadsheet.
You can fill in you own copy by following the steps on this page.
So, before you start ordering any electrical parts, think about how you are going to use the power supply in your campervan conversion.
This will give you a solid idea of what spec your leisure battery, solar panels and charge controller will need to be to meet your daily power needs.
Campervan Battery Size Calculator Download
The spreadsheet is available both as a Google Doc to copy or a downloadable Excel file.
To get your copy in either format, sign up as a free VanLife Tribe member by clicking the button below.
This will also give you unlimited access to the full Van Build Tools library 🛠
The Google Docs version looks like this:

Follow the instructions in the yellow box on the spreadsheet to make your own Google Drive copy.
Then, delete the yellow instructions box when you are ready to start.
In the Excel version you won't see the yellow box. Just download and open the file to begin.
Calculate Your Van Conversion Power Needs
Follow the numbered steps below to fill in the Battery Size Calculator and get your campervan electrical calculations.
1️⃣ Open the spreadsheet and list everything you are going to be installing or using in your van that requires any electrical power in the ‘Item’ column.
This includes both the fitted elements such as lights, water pump, fridge etc and the stuff you’ll plug when needed like a laptop, phone, TV etc.
You don't need to include any sockets here, such as USB or 230v sockets. They can be included in a later calculation.

2️⃣ Enter how many of each item there will be in the ‘Quantity’ column.
For most things, this will be 1 but you might want several LED lights for example.

3️⃣ In the ‘Voltage’ column, select either 230v (UK standard) or 12v for each item.
230v items are the ones you’ll have to plug into a mains socket that runs from an inverter such as a laptop.
12v items will be wired directly to your leisure battery, such as the lights, fan etc.

4️⃣ Look at the label on each item (or search online) to find out how many Watts it uses and add that into the ‘Watts Rating’ column.
Some appliances won't give a Watts rating but will show the Volts and Amps it consumes, like the figures shown on this phone charging plug.

We can work out the Watts using the following basic calculation:
For our plug, that's 5 Volts multiplied by 4 Amps giving us a total draw of 20 Watts.
It might take you a while to get all the figures but it’s going to be worth it in the long run.

5️⃣ Enter the number of hours you estimate that you’ll be using that item per 24 hours in the ‘Hours Used’ column.
If it’s less than 1 hour use decimals here i.e. 0.5 for half an hour.
This is the amount of time the item will actually be drawing power.
For example, a fridge will only be running for around 50% of the time so you'd enter 12, if you'll charge your phone for 2 hours a day, enter 2 and so on.

6️⃣ The ‘Watt Hours’ column will then automatically multiply the Watts Rating by your estimated usage time.
This gives you a ‘Watt Hours’ (Wh) per day total for each item as a starting solid point.
The 'Amp Hours' column then automatically divides the Watt Hours figure by 12.
This tells you how many Amps each item will typically use in a 24 hour period.
This is the key to sizing your leisure batteries and solar panels!

Add Your Inverter Efficiency %
If you want to run any 230v 'household' items, such as laptop chargers, from your leisure battery, you'll need to install an inverter as part of your campervan's electrical system.
An inverter converts (or inverts) the 12v (or 24v) power from your leisure battery up to a 230v output - or whatever your country's mains (i.e. household) power voltage is set at.
As it does this there’s always a loss, meaning inverters don’t usually run at 100% efficiency.

This is known as the ‘reversing efficiency’.
To allow for this loss, enter your inverters efficiency percentage in the dedicated box on the right of the spreadsheet.
It can be tricky to find this figure but have a look at the specifications at any inverter model you find.
The efficiency rating is usually around 80% to 90% for most inverter models.
Adding this % will help you to fine tune the calculations for the exact size of battery you'll need.

Get The Best Campervan Leisure Battery Size
Now you have a solid estimate of your daily power usage, minus the inverter efficiency, you can work out what size batteries you’ll need.
The capacity of leisure batteries are given in Amp Hours (Ah).
Put simply - if you use something that takes 1 amp of power to run - this is the number of hours the battery could power it for.
However, most van conversion leisure batteries can only be discharged (drained) by 50%.
Shocking I know, but letting a leisure battery drain below half its capacity can begin to damage it and drastically reduce its future efficiency!
The good news is - the spreadsheet takes the total of the 'Amp Hours' column and divides it by 50% (maximum leisure battery capacity).
This gives us the minimum battery size you’ll need for 1 days use, shown in the Battery Size Calculation (Ah) area of the spreadsheet.
I’ve also multiplied this for 2 and 3 days off grid use for good measure.

As we can see in the above example, if all the items in our van add up to 95 Ah of use per day.
The spreadsheet tells us we'd need a 190 Ah battery to go fully off-grid for 1 day.
Remember that these numbers are based only on using power and don't factor topping up the batteries.
By using solar panels and/or an alternator you can replace some or all of the juice you're using.
We'll take a look at camper van solar setups in the next section.

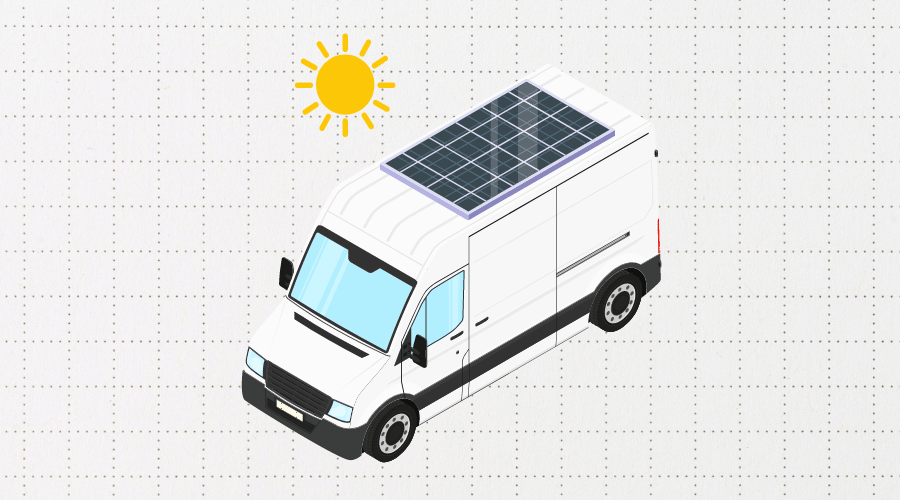
Campervan Solar Panels - Calculator and Setup
Being able to generate your own electricity for free on the road is a true game changer.
There's nothing quite like going off-grid for a few days at a time in good weather.
There are 2 main components to a campervan solar system -> Solar Panels and a Charge Controller.
👉 Solar panels, usually attached to your van roof, convert solar energy into electricity.
👉 A charge controller will help to manage the flow of power from the solar panels into your leisure batteries and keep them healthy.
Charlie’s Tip: It’s a great idea to install your solar panels onto the roof of your van before working on the ceiling insulation. You’ll be able to easily bolt down the brackets and secure them from the inside if needed.
What size solar panels do you need on a campervan?

Solar panels need some decent sunshine to work at their best.
To estimate how much solar energy you could enjoy, take the average annual total for the places you will travel from this world map.
Then divide it by 365 to get a daily average.
Enter this figure into the grey ‘Hours of Sunlight’ box on your spreadsheet.
The ‘Solar Panel Estimation ☀️’ will now give you the Wattage size of the panel array you’ll need to meet your estimated power usage.

In the example above, we're travelling across Europe so I took the conservative figure of 1,600 sunshine hours a year.
Divided by 365 days, it works out at 4.3 hours of sunshine a day.
Adding this into the grey box tells us that we'll need 378 Watts worth of solar panels on the roof to meet our daily energy needs.
This is really a best 'guesstimate' and will vary wildly by season and location in the real world.
For solar panels to work at their best, they need to be pointing directly at the sun.
That's pretty hard to achieve when they are fixed flat to your van's roof!
That said, it’s still a useful tool for getting a rough idea of your campervan solar panel requirements.
Any additional power is a bonus, especially when it's free!
How many solar panels do you need?
It's best practice to plan out your solar array after working out the placement of any vents, fans, ariels etc.
Solar panels come in different shapes, sizes and wattages making it easy to configure them to the remaining space on your van's roof like this:

In our example spreadsheet calculations, we estimated we'd need a total of 378 Watts from our panels.
To get close to this, we could use the above configuration of 3 x 120 watt panels, giving us a total solar array rating of 320 watts.
Or, we could use a single higher wattage panel if we have the space to do so and increase the overall rating of our setup.
How you approach this really depends on your available roof space and your budget.
How to wire multiple solar panels together
When doing research for my first campervan conversion, I researched a lot about wiring solar panels in series vs in parallel.
It's easily a topic you can waste hours on, but the key principle is this:
Wiring In Series = multiple panels operating as a single unit.
Wiring in Parallel = multiple panels functioning independently from each other.
This basic diagram shows you how this works as part of a campervan electrical system:

The main takeaway here is that wiring the panels in parallel can require longer cables (greater voltage drop potential), connectors and general faffing around.
You want to keep things as minimal and tidy as you can on your van's roof so I'd wire your panels in series if possible.
The main advantage touted about wiring solar panels in parallel is that if one is in the shade, the others will still be pulling maximum power.
This might matter across a large array on the roof of a building, but the easiest way to remedy this with a van is to move it out of the shade!
Get the Correct Solar Charge Controller

It’s important to install a charge controller that can handle the output from your camper van solar panels.
These units have a rating in Amps.
This calculation shows you what Charge Controller rating you’ll need for your campervan solar panels:
To make it super easy, you can use the 'Charge Controller Required 💡' box on the spreadsheet to calculate this.
Enter the Wattage and Voltage of your chosen solar panel in the grey boxes, as highlighted here:

Solar Charge Controllers usually come in multiples of 10 Amps (20, 30, 40 etc).
I’d suggest you round up your figure up to the nearest 10 to ensure you are extra safe.
Getting a unit that’s rated too low for your panel output could lead to it overheating and potentially causing a fire in your van!
There are 2 types of Solar Charge Controllers readily available, PWM (Pulse Width Modulated) and MPPT (Maximum Power Point Tracking).
All you need to know is that MPPT models are a bit more expensive but they are more efficient at extracting maximum juice from your panels.
I'd suggest paying a little extra here for the long term efficiency benefit.
That's it!
You've now completed the campervan battery size calculator and got all the numbers you need to confidently spec out the rest of your campervan electrical system.
Head over to the main campervan electrics guide now to plan out a full electrical system for your van conversion!
If you've found this leisure battery and solar panel size calculator useful then please consider sharing it with others who could benefit from using it.